3/28/2021

A creative use for Slimline Cards

Welcome, thanks for stopping by! So, I am wondering, what is your take on slimline cards? Do you love them? Do you hate them? Could you take them or leave them? Have you even tried one? 


If you've been around in the card making world for longer than 10 years, you'll certainly know that slimline cards are nothing new. They, just sort of fell out of the in thing to do. Well, like middle parts and 80s mom jeans, they are back! But they are back in a good comeback kind of way!


So today's card features a usable bookmark with with front pocket. The inside is blank. 

This card comes from a crafty challenge I joined over the weekend. Craft roulette Facebook page. 

The challenge called for: 
a bookmark
Colors: Red, Yellow and Blue
Besties 
Dry embossing 

So this was super easy to make, and I had so much fun adding these elements into a card. below are the measurements:

Card base: 7x8.5 scored long way at 3.5
First Panel: 3.5 x 8.5 
Second Panel: 3.5x8.5 cut diagonally 2.75 inches from the bottom right to the top left corner. 
Bookmark: 7.75 x 2.25

Supplies used:
Inks: Intense black, Lemonade, Bluebird, Peach, linen, toffee, and Sundance.

I hope you enjoyed stopping by for a quick overview an easy slimline card! 

Danielle 

3/26/2021

Show & Tell | Winged Masterpiece


Hello and Welcome to my little crafty corner. 

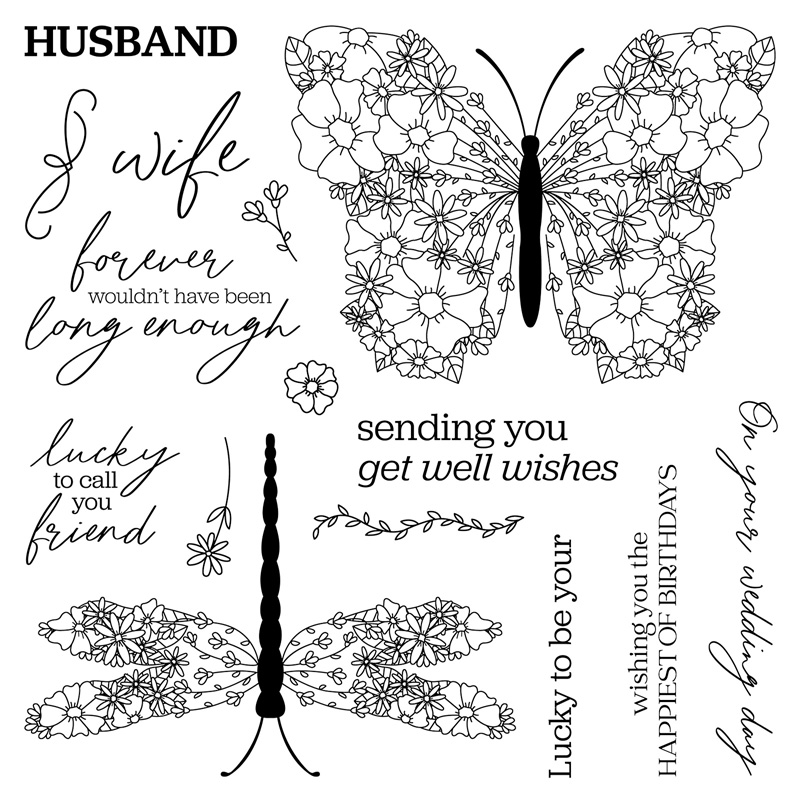
I happy to show-off the new winged masterpiece stamp set and tell you all about the 5 cards I created with it. 

The first thing that stands out, are the delicate features of the butterfly and dragonfly. Then you move into the mixed fonts. This is something I look for in stamp sets that are meant to be versatile. With 15 images and sentiments, the card and scrapbook page ideas are endless. 
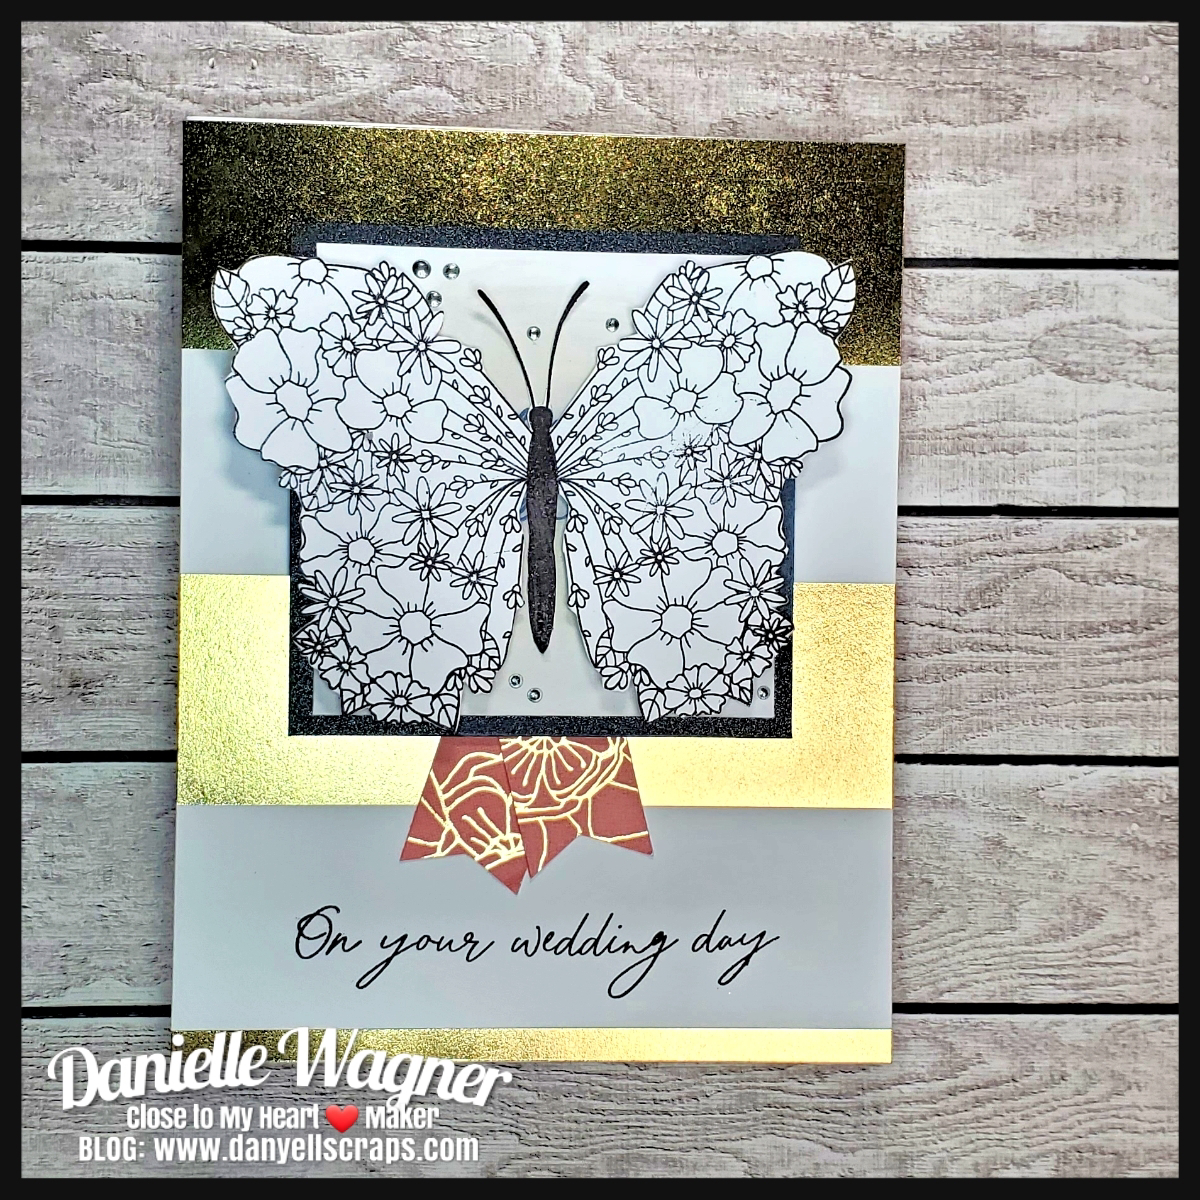
My first card shows off the stunning butterfly. I am using a retired paper collection called "Happy Times." I loved the blank space at the bottom, as I was able to use it for a sentiment. I chose on your wedding day. The black paper used on this card and many of the next ones is the black ore paper. Let me say this paper is nice and thick! So it is perfect for mounting those sentiment pieces. It would great as a standalone feature also. I finished each card off with drops of liquid pearl in onyx, I will note this along the way. 


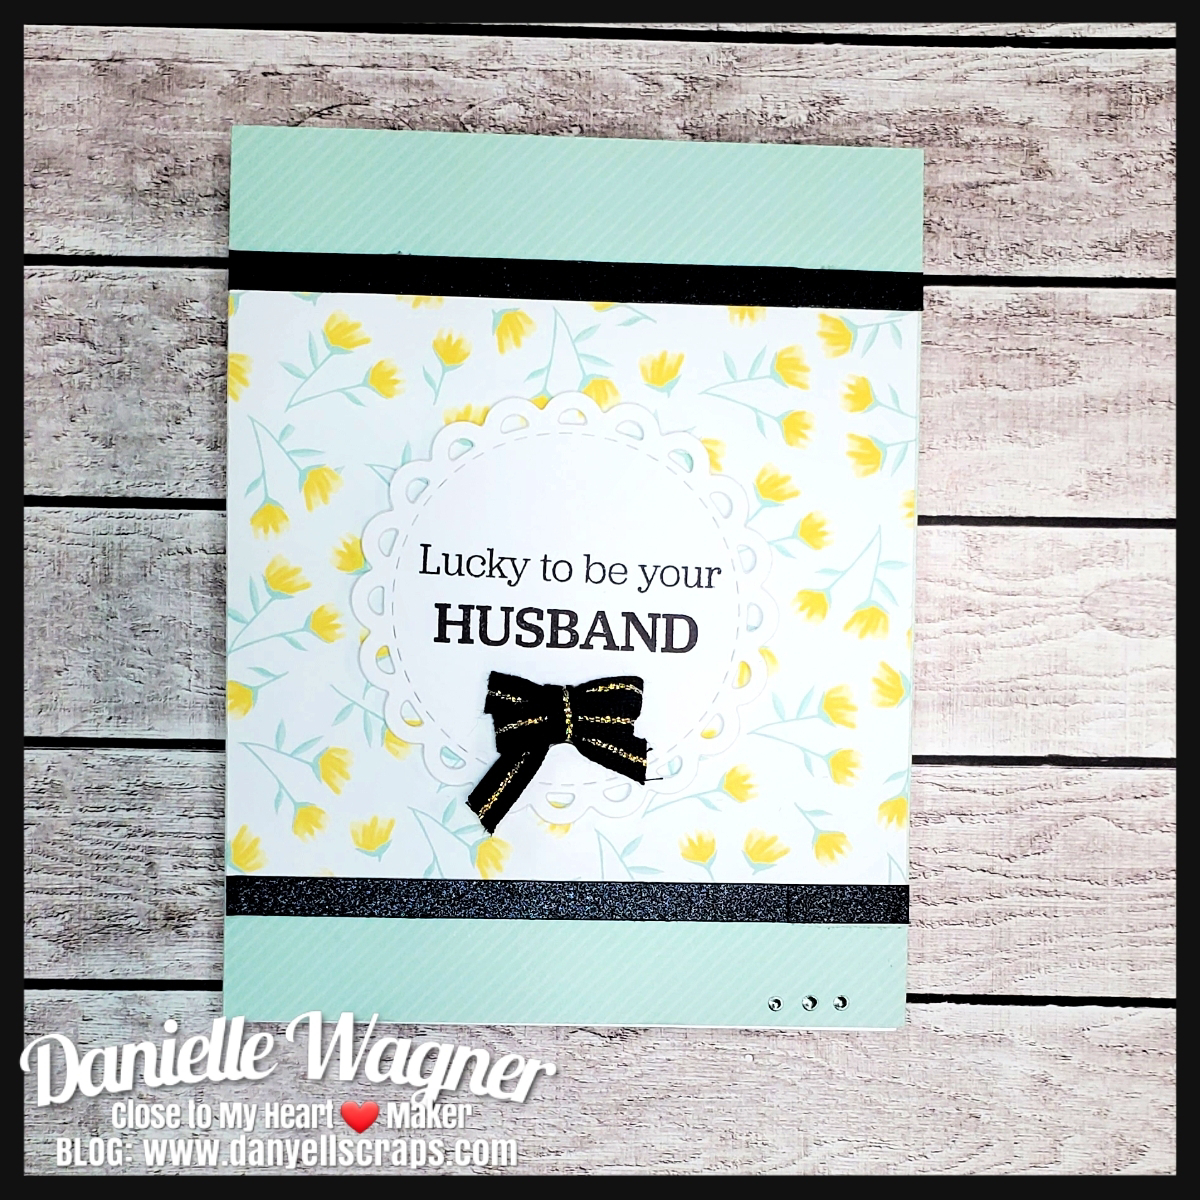
I really wanted to show off these canary flowers. This background paired nicely with the new scalloped circle die. The Lucky to be your is its own stamp, so it can be paired with Husband or Wife. I started to us Wife, but thought how beautiful would it be for wife to receive this, and changed it to Husband! (This set will go to my parents, saving the day for my Dad, one card at time.) check out that black ore paper again, see the shimmer it has? 


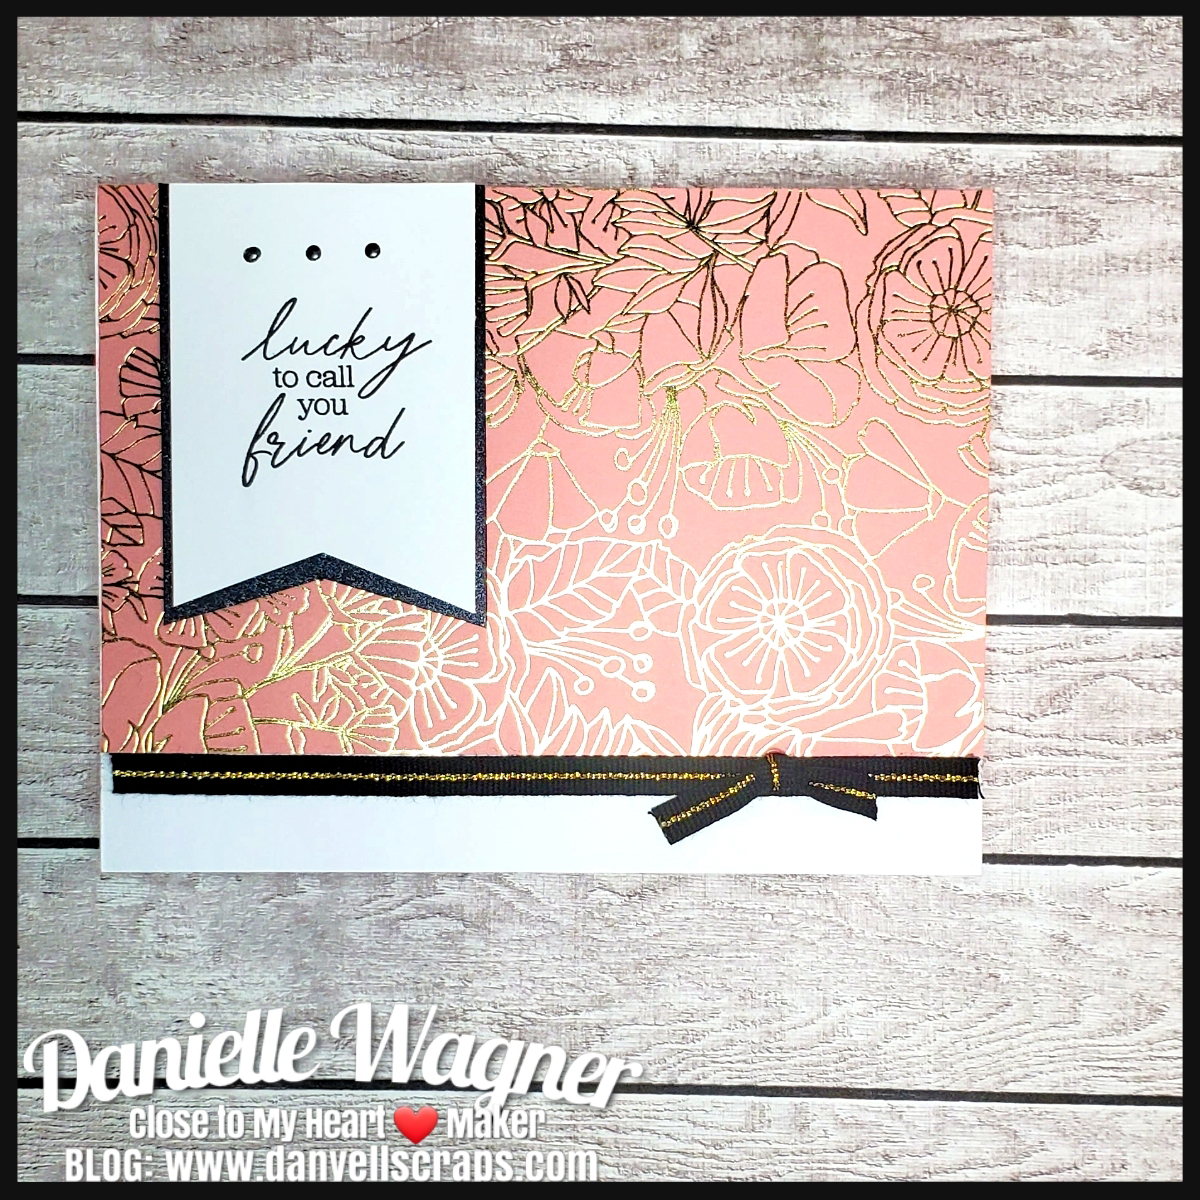
While hard to capture in picture form, the beautiful paper is embossed in gold with flowers all over it. I thought it was so cool at how close it resembled the details of the wings of the butterfly and dragonfly. For that reason I did not add either of those to this card, so there wasn't a competition of patterns. Because, that can totally be a thing. I did add in some retired black and gold ribbon. and tied off a pretty bow and few drops of liquid pearls. 


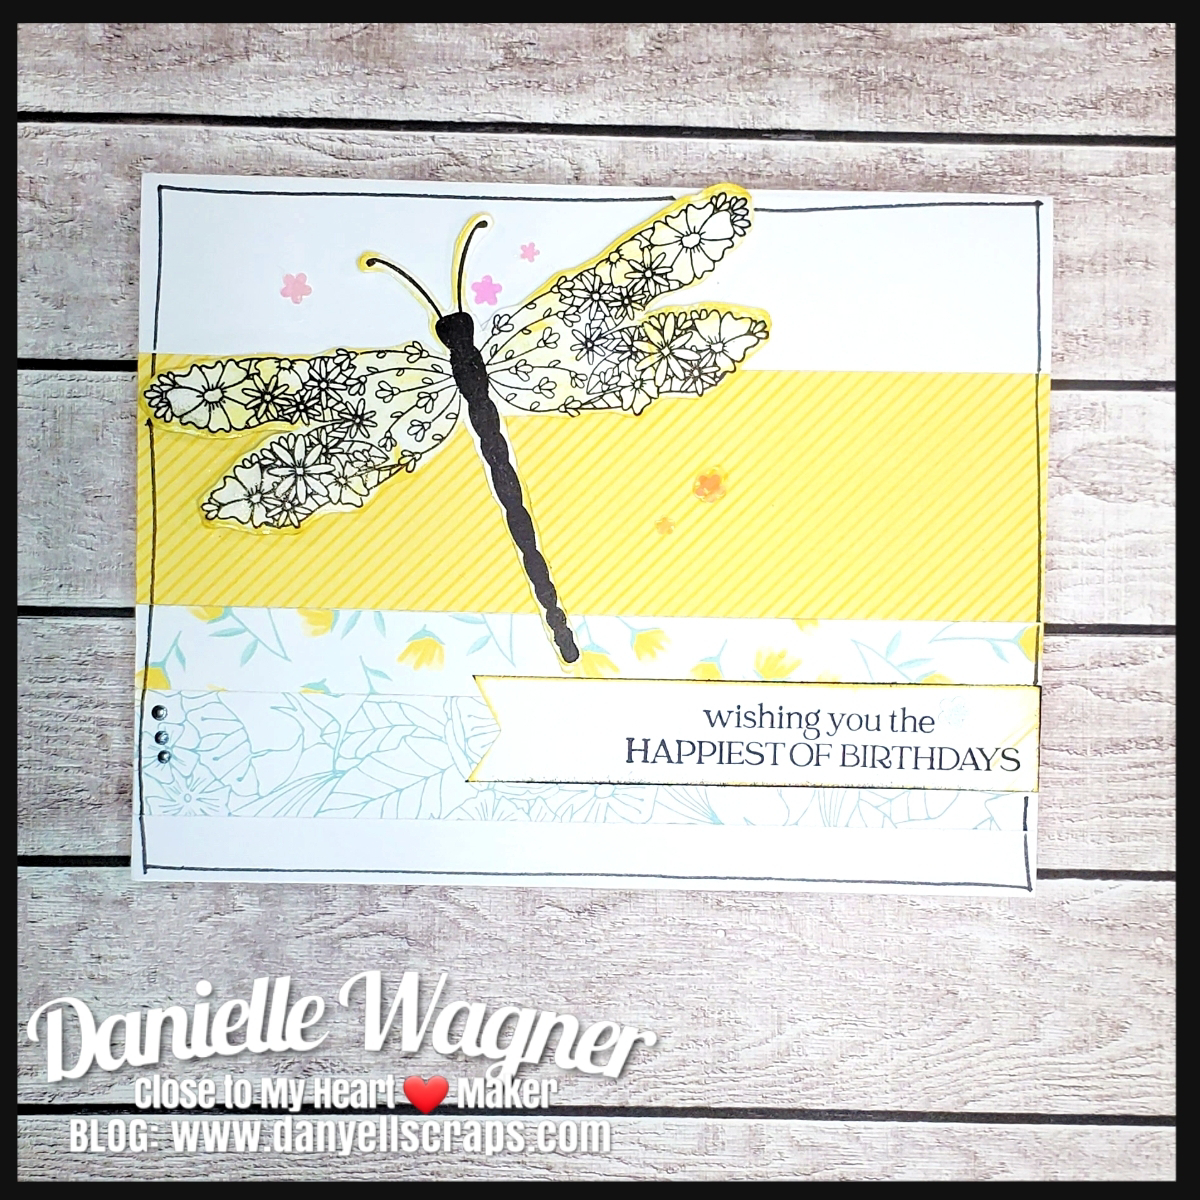
This cut dragon fly had to be shared. But when I cut him out and added him to the card his stark white and black pattern stuck out like a sore thumb. A little bit of canary ink wisped on top of it, with some ink edges or distressed edges, helped soften him up. A few flower confetti pieces added, plus three dots of liquid pearls in onyx pearl tied in all the black and white. I added a sentiment dovetail piece with Wishing you the happiest of birthdays. Again, that mixed font really stands out, right!


The final design, shows a faint butterfly floating off the left side of the card. While hard to see in photo, it is just stunning person. With a little bit of clear shimmer added to the butterfly, a partial outline and three more of those onyx pearl drops, this card stands out for some well wishes. 


I hope I have inspired you to get crafty with these fun cards. Below are the details I offer as a consultant to my crafty friends who shop with me. So many thanks for stopping by and taking a moment to check out my show and tell!

Best regards and happy crafting!
Danielle


How to get these cards as a kit! 

1. Place an order on my website and qualify for the stamp set at the $5.00 price point. I will mail you the kit to make 5 cards, 1 of each design shown above. I will also email you the cutting files to recreate all 5 designs, 8 cards each for a total of 40 cards! The designs are easy enough to recreate using ANY paper collection you have on hand or from my website. 

SHOP HERE


If you have not already I encourage you to sign up as VIP Customer with CTMH under me. The VIP Customer Program is your chance to earn shopping credit on your purchases while getting access to exclusive product and perks! It is $25.00 and you get an instant $15.00 credit to use on your first purchase. Some of my customers have earned over $100 in free products so far! Don't miss out, join today! 


Again, thanks for stopping by! 
Danielle

3/19/2021

Can you really use scraps to complete a Sketch?

Hey there!

So today, I want to talk about using your scraps with sketches. 

Listen, if you have a pile, box, bag, file or what-have you of scraps, and all you're doing is adding and adding, why do you have scraps? 

Same with your pinterest boards! I am talking about the one that you save every scrapbook sketch to. The one you keep adding to but never really do anything with!  Time to marry your scraps and sketches and get those photos off your phone, and into an album!

Don't start tomorrow,  or worry about scraping in order....just start! 

Okay here is the sketch I used in today's inspiration piece: (Found on a public Facebook group)

I grabbed some scraps from the party collection and went to town! 
I guessed at the measurements,  and went from there. 
I should tell you those three long dovetail banners behind everything re scraps of paper. Those pieces do not extend the length of the page... see how wonderful scraps can be.
Have more photos to to add? Snag a package of the flip flaps from Close to My Heart ❤ seriously the best way to enhance your photo-estate! 

I add a (gasp) scrap dovetail zip strip to the edge so you know to flip it up. 

I truly hope I have inspired you to be crafty and to bust your scrap stash!

Danielle

3/18/2021

Why keeping your scraps pays off.

There are two types of crafters, those that keep their paper scraps and those that toss them when they are done. 

Here are a few layouts and cards I made by just using my scraps (not counting base pages)


So if you're one to toss your scraps, take a second look before tossing them. If you're one who keeps your scraps, I hope you find some inspiration! 

Danielle 

3/17/2021

How to color your images without markers, or water paints.

I love to color my stamped images. My favorite to color them is with water based dye ink and a water brush. I have gotten really accustom to created beautiful shades this way. But no today!

Today, we are digging into our stash, and we are going to paper piece our stamped image for coloring. 

This is fun and really does not take much more time, perhaps even less that watercoloring does. 
This cute images was stamped 4 times on,White daisy for the base, sweet safari for the skirt, scrap for the boots and jacket, and Sundance for the hair.  Fussy cut each small area out, add some gold shimmer brush for highlights in the hair and sun and you're good. 

I did come in with some peach dye based ink for some skin tone and to color the pot and flower. Opps I cocould't stay away from watercoloring after all. 


Video tutorial: via my Private Facebook group, DanyellScraps & Friends. 

Inspiration from page 31 of the March April catalog.

Supplies and measurements:
Mixing collection x9026 
8.5x11
4x2.75
.5x2.75
Diagonal cut 7.5 tall x 6.75 long
Zip strip .5x6.75 + .5x3
White daisy cardstock 8x10.5
Avocado cardstock 4x6
Smoothie cardstock .5x8
Ballerina Cardstock 4x6
Sundance cardstock fussy cut

Inks: Sundance, intense black, Peach, Toffee, Avocado, 
Gold shimmer brush (sun and hair)
Micro-tip Non Stick scissors 
Tombow mono liquid glue. 

Stamp sets: besties - kelsie Z3938 and sunny days ahead B1734

I hope I have inspired you to be creative. 

Danielle

3/16/2021

An easy to use your scraps up today!

Do you have LOADS of scraps, or just a few? This project is perfect using them up. 


I started with two bases pages in espresso cardstock, and 20 squares left over from the sweet safari paper collection and cut them diagonally to create triangles. 


Using an outline, I placed the triangles until I got the shape of a heart. I wanted the heart to look as if there was a glow behind it, so I blended tattered rose distress oxide ink  on the center of a 11.5 x 11.5 White Daisy cardstock. Still a little bland, I added some splattering with the black shimmer brush


I carried on the triangles with a line of them mismatched on the right side. To complete the layout I used micro tip scissors to cut LOTS of tiny cuts along the scraps avocado pattern paper to create grass. A few animals fussy cut from the HERO paper of the sweet safari collection helped tie in the theme. All of my pictures are matted using the stunning candy apple cardstock. I am still missing a title, but that could take a while, I couldn't want to share. 

I showed how to create the heart on during my Make it Monday Video tutorial in my group DanYellScraps & Friends. I'd love for you to join us. We have over 100 crafty peeps who share a love of CTMH, Challenges, Tutorials and more. 

I hope you find this inspiring!
Danielle

*my group is open to those who are not already CTMH Makers and reside in the U.S. 

3/15/2021

The Midas Touch | A H2H color challenge

Welcome to a new Heart 2 Heart challenge. 
The Midas Touch!


Your challenge this week is to create. Project with gold. This week I focused on the gold shimmer brush. 


Now go upload your beautiful project here: H2H Blog

Remember your project should have CTMH products in it to qualify.