7/30/2016

Letter P-Everything ABC Blog Hop

Hello Crafty Peeps  and welcome to the Everything ABC's Blog Hop!


For this hop we will be featuring the letter P. This may be the name
of a paper, a stamp set or an embellishment. I have chosen to focus on Purple, as this is my most favorite color! 


If you came from "Wendy Kessler" then you're on the right track!


Shaker card with purple sequins, shimmer trim and Stars.
Everything started as white, and using my ShinHan Marker! I was able to color right on my trim, paper stars, and sequins to achieve a perfect coordinating embellishments.  

Supplies Used: 
White Daisy Cardstock
Zoe Paper packet
Black ink
Artbooking Cricut Cartridge for the star frame
Shin Marker - Colors; Lavendar, Tendar pink, Livid Green
White Shimmer trim colored with ShinHan Color: Lavendar
White Sequins from Calypso compliments colored with ShinHan Color: Lavendar
Remainder of the sequins are from my stash (not CTMH)

Your next stop on our Everything ABC'S blog Hop is " Darlys Recker" of  Crafty Happy!

In case you get lost along the way…go to Catherine Nowak or a complete list of participants!

Thank you!
DanYellScraps

7/15/2016

Picture My Life Fun!

Picture My Life Fun!
Welcome to our Technique Blog Hop!  This month there are {10 } of us highlighting the PICTURE MY LIFE FUN!” 


This blog hop is a great big circle so you can start wherever you want and continue through to see all the fabulous artwork incorporating this technique. 

If you are coming from {Helen Gullett} Blog, you are on the right track!
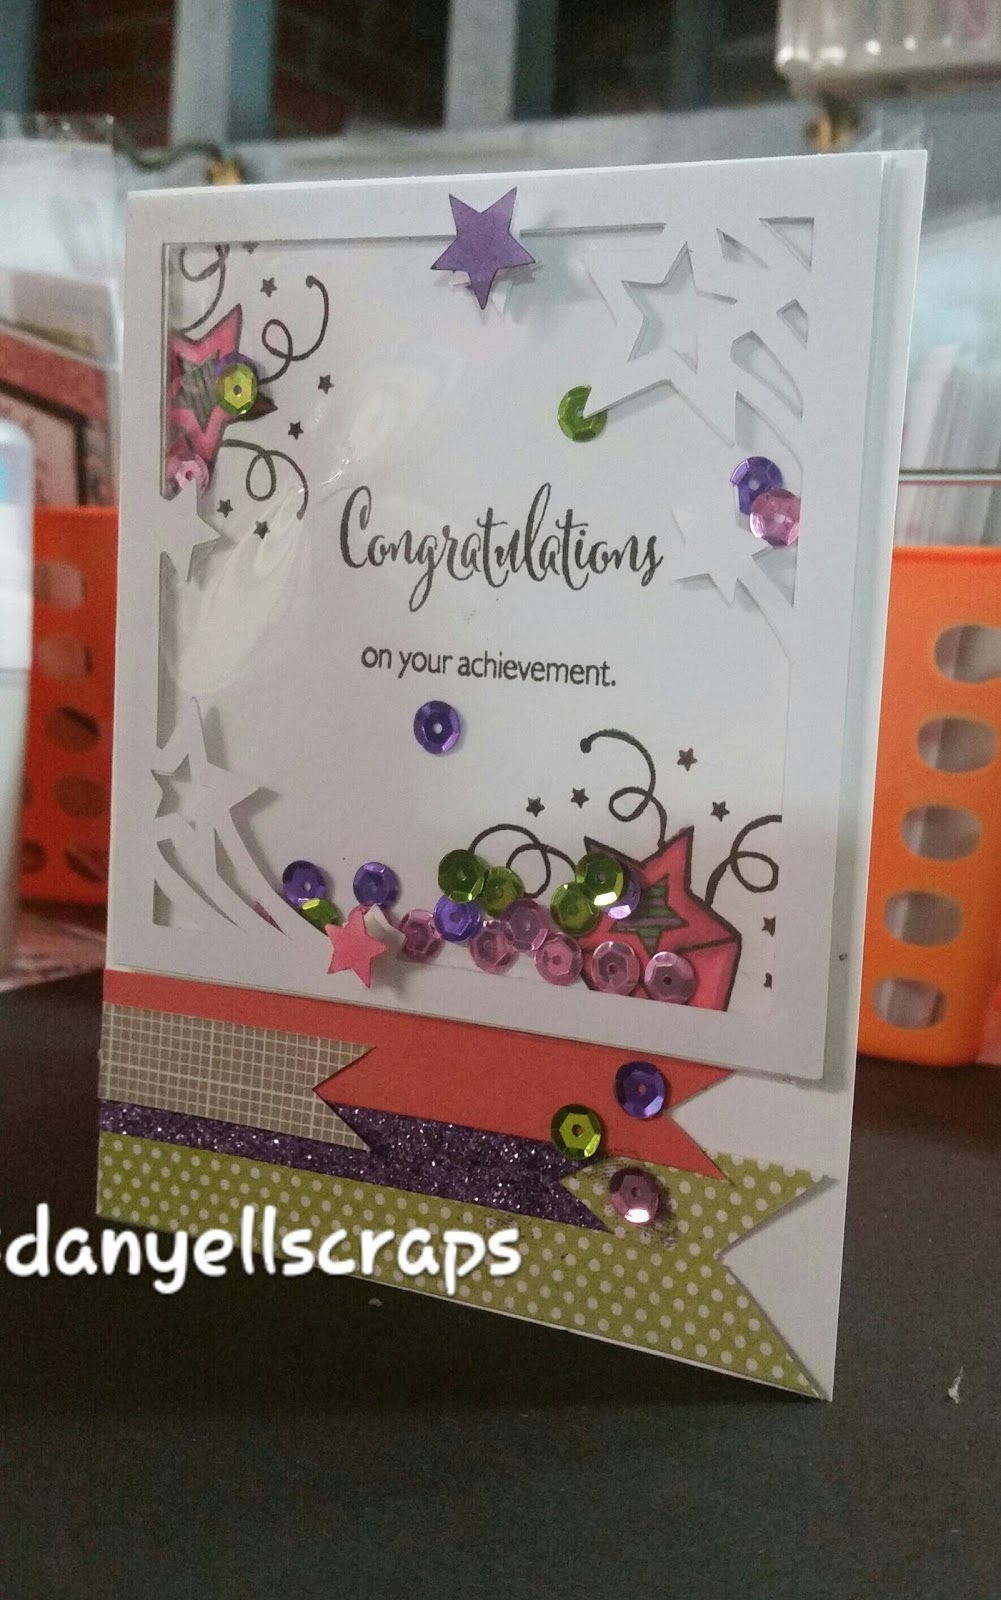
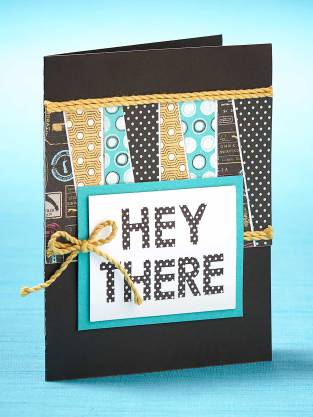
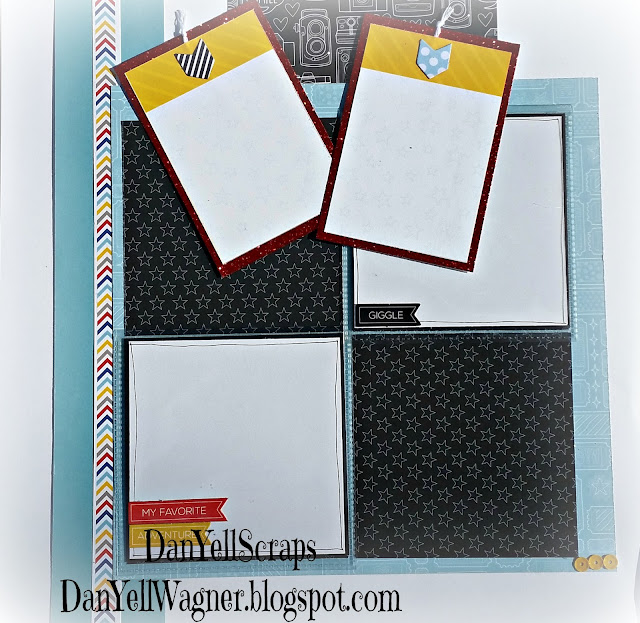
Because life is too short for average cards...Lets Look at the PML Overlay Window Card Technique.

To recreate this card you will need the following items:
  • PML sheet from the 'Florence' paper packet
  • Poppy card stock
  • White Dasiy card stock piece 4x5
  • Scissors
  • Paper trimmer
  • PML Overlay
  • Adhesive


Trim you poppy card stock to and 8 1/2 x 11 
Trim your 8 1/2 x 11 (horizontal)  and cut at 5 1/2

You should now have two 8 1/2 x 5 1/2 card bases.
Score them at 4 1/4

Cut one card base at from the edge at 1 1/4
Your next cut will be from the score line at 1 3/4
Using your scraps from these pieces, make the following cuts
1 1/4 by 5 1/2 and 1 3/4 x 5 1/2 
Cut your PML 'Hello' overlay down to 5 1/2 long.
Cut your Selected PML card from the florence sheet to 1 x 5 1/4
I then cut a second piece at 5 1/4 x 1 1/2. 


Trim off 1 1/4 from the bottom of your card and set it aside. 


Adhere your PML card to your poppy card pieces.


Time to adhere your overlay. Take off the protective backing.


I adhered to the top base inside first, then added the bottom border.  

Now Adhere your cut poppy card stock pieces to the inside, covering up the the overlay at the top and bottom.


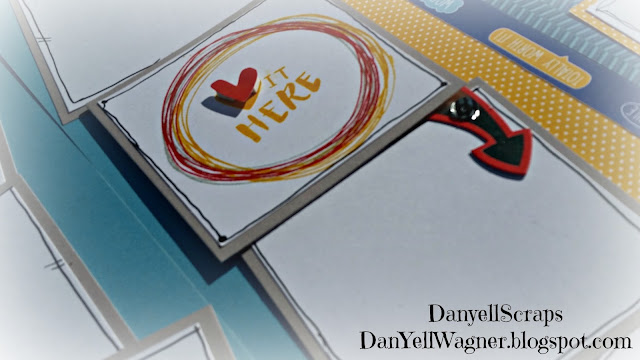
Adhere your White Dasiy card stock to the inside and add your desired sentiment. top the front off with some sequins...


There you have The PML Overlay Window Card Technique. 


Instead of Sliding these into a Flip Flap, or adhereing it over some pretty paper to use as a traditional overlay, I used it as a window for my card. With the gold foil 'Hello' already marked on the overlay, it makes a perfect card sentiment. 

Supply List:  
  • Florence PML sheet (included in the Florence Paper Packet)
  • Poppy card stock
  • Picture My Life Gold Overlay
  • White Dasiy card stock
  • Sure Cut paper trimmer
  • Straight to the Top Stamp Set 
  • Florence blue sequins 


Thanks for stopping by!  

Please continue onto {Janna Gray} Blog where you will find some additional artwork highlighting this technique!  

Be sure to leave a comment and let me know what you thought of my variation and happy hopping!

  1. Melissa Robinson - http://mlisrobinson.blogspot.com/20...
  2. Wendy Kessler - http://www.myscrapbookingblog.com/2...
  3. Darlys Recker ~ http://craftyhappy.blogspot.com/201...
  4. Catherine Nowak ~ http://catscrapbooking.com/2016/07/...
  5. Kirsten Jade - http://scrapbookingwithkirstenjade.blogspot.com/...
  6. Cathy Bufano - http://cathybufano.blogspot.com/201...
  7. Helen Gullett - http://helengullett.com/?p=9469
  8. Danielle Wagner -YOU ARE HERE
  9. Janna Gray - http://www.jannagray.com/ctmh-technique-blog-hop-picture-my-life-fun
  10. Tonya Whitehurst - http://heartandsoulscrappers.blogspot.com/2016/07/picture-my-life-fun.html


7/13/2016

Tip Tuesday: Cards & Scraps + Contest!

Tip Tuesday - Cards & Scraps

Bonus - Contest at the end of this post! :)

Hello Crafty Peeps!
Here's your Tip Tuesday spotlight tip!

Grab your bag, box, drawer or what not of scraps, and lets make some cards! Use your small scraps to create one-of-a-kind cards and layouts. Small scraps are great for making small Cricut® cuts,
weaving, creating mixed stripes, designing a quilted look, and making little banners or sunbursts for your cards and layouts.

Check out the embellishments that add that finishing touch, such as the teal Shimmer Trim, or the bling gems gold assortment, those little glittery pieces of this and that, provide the final bit of glam for these hodgepodge cards. 5 1/2″ x 4 1/4″ Hello Sunshine Card
Wishes: Celebration Card Workshop—Card 4™


Steady patterns that lend structure to the patchwork design. One way to balance out the discord from using scraps is to corral them into a simple and repetitive design, like those seen on these cards. It’s all about that yin and yang! 5 1/2″ x 4 1/4″ Hey There Card
Wishes: Three in a Row™

So get out there and use up your scraps - use these cards as inspiration! What are you waiting for? 
Send your cards to DanYell81@gmail.com by 7/30/2016, and I will post them on my blog in a spotlight post. The card with the most likes, will get a FREE stamp set from me! 

Have a Happy Scrappy Day!
DanYellScraps.


7/06/2016

Scrapbook Blessings Club: Flip Flap Trick for Scrapbook Pages

Hello Crafty Peeps!


Join me over at SBC's blog  today! Scrapbook Blessings Club: Flip Flap Trick for Scrapbook Pages:


Watch my tutorial, where I will show you how I added, and made the flip flaps on my magic layout come to life!


Danyell Scraps


7/03/2016

'Big Smiles' Workshop

'Big Smiles' 10 Page Workshop!


Hello Crafty Peeps!

I have worked so hard on the workshop. It has taken me about month to get her wrapped up. I am super proud of each layout. Just when I think one layout is my favorite, I see elements on another layout, and think oh wait this is my favorite...so I guess what I am saying is, they are all my favorite. 


There are 10 pages, making 5 double page layouts, with a whopping total of up to 63 picture spots available. How did this happen? With the magical powers of Flip flaps. These triple your picture real-estate, by adding 2 pictures, for every flip flap added. AMAZING, Right!?!?! Combined with the Magic paper collection from CTMH, this workshop will have you ready to take a vacation just have pictures for this! 

Okay so let's take a look at the 'Big Smiles' Workshop layouts one by one.


Layout 1

 
Check out the Glitter paper, it gives this layout such a touch of class. This layout holds 6 photos total, With two areas to add your story! Those camera embellishments are just the right addition to the photo mattes. This layout holds 6 pictures.

Check out the split photo spaces. I love the twist this brings to the page. 

Layout 2


 This layout was so much fun to create. Inspired by a movie reel, I added several photo mates down the edge of each pages to have them marry in the center. A layout that captures all the fun things that go with the story. Lots of places to add journaling. There is an option to add up to 11 photos. Holy Moly!


I love the arrow compliments, they drive your focus to specific photos, or journaling. Perfect subtle touch. 


 The Yellow Polka Dot B&T paper is super cute! The zip strip with caption bubbles really set the idea for this page and made it super fun to add the bubble compliments. These were given a boost with some 3D Foam tape.

Layout 3.


 Let's Ride - This layout reminded me more of a road trip then a theme park. This layout has a secret to tell, there are 20 photos spots...Check out how the magic happens...

Check out those flip flaps in action. They have taken this page from 8 photos to 20 in a flip!


 Popped in a little shimmer trim to give the inside of the flip flaps some flare and this Let's Ride layout is ready for some fun pictures. 

Layout 4:

  My oh my these pages just keep getting better and better. At first glance this layout holds 8 photos, and two journaling cards...
 
 Look at those peeping journaling cards...By adding a some white twine behind the arrow compliments, a pull tab was created. 

 And here you can see were each layout has a spot for 4 additional photos. Bringing this layout to 16 photos spots. Totally my favorite layout by far...

Layout 5 - last but not least...


Love This layout is so adorable, the left side has room for 4 photos, and did you see that adorable banner? The center is captioned with a heart for Love. Jump over to the right page and you can see, this page has room for 3 photos, you know I added those flip flaps to this layout too. That brings the total to 10 photos spots. WOW!
 Here is a close up of that awesome banner...white twine, some sequins and compliments give this all the detail for a stunning banner. 


Here are the flip flaps in action... :0

Another look at the entire workshop


I hope you enjoyed my layouts as much as I do. 
Below are a list of supplies I used to create the 'Big Smiles' Magical Workshop:

Magical Paper Packet   $9.95 X7209B
Magical Complements $3.95 Z3294
Magical Sequins $6.95 X7209C
White Twine$2.95 Z3216
Flip assortment Z1747 $3.95
Flip Flap 4x6 protectors $3.95 Z4114
Red Glitter Paper: $5.95 Z3075 

Optional Supplies: 
Shimmer Trim: 
Red Z1848  $4.95
Blue Z3025 $4.95
Black Z1809 $4.95 

Additional supplies needed from your stash: This is to Create bases and photo mattes
White Daisy card stock: 10 Sheets  Item 1388 24 sheets $9.50
Black card stock: 3 Sheets. Item 1386 24 sheets $14.50
Crystal Blue card stock 2 Sheets; item 1292 24 sheets 
Whisper card stock: 2 Sheets

You can shop for all the supplies at www.DanYellScraps.CTMH.com  Just join my Celebrate party link.

Once I see your order, I will email you the cutting guides for each layout. With a Full color photos of each layout for easy duplication. 

If you are a fellow consultant. You can contact me via email DanYell81@gmail.com to purchase a copy of the layouts and cutting guides for your classes. 

Thank you so much for checking in. :) 
Have a Happy Scrappy Day
DanYell