12/31/2019

Double Layout | Masculine Paper - Urban

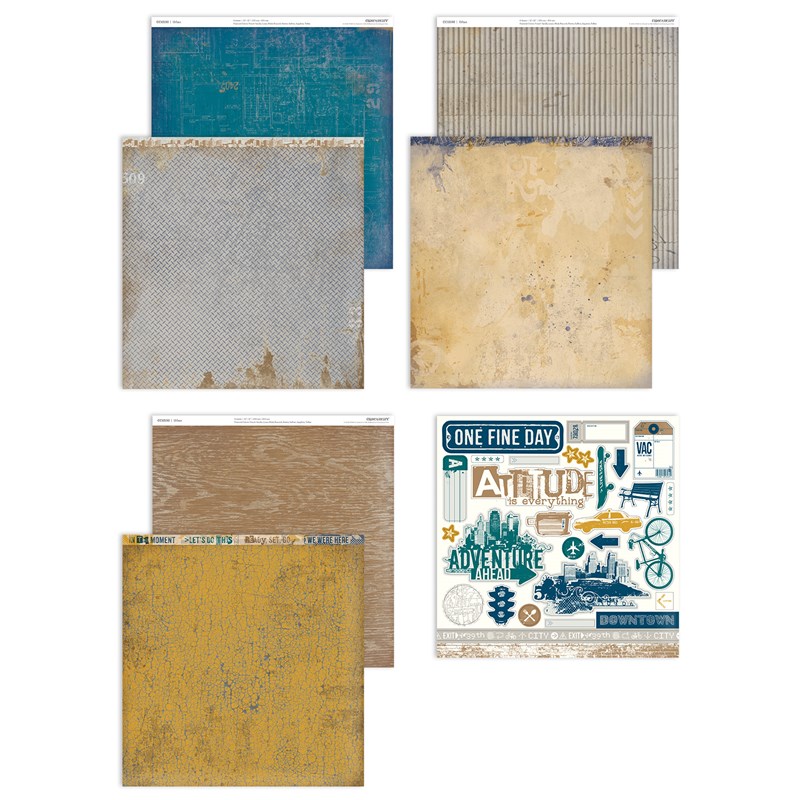
It's the last day if 2019, and the last day for the throwback paper collect, Urban! I am so glad I had the chance to play with this collection once again!

Here is the final [my favorite] layout from the free instructions found on my website:

You know I have one final Urban video tutorial for you also!


Last day to grab the Urban workshop files (Free) and the paper collection plus sticker set ($9.95) 

SUPPLIES:

Thanks for stopping by! Here's to 2020! 

12/30/2019

Scrapbook Layout| Urban Paper CTMH

Urban Throwback Masculine Layouts

I am back with another layout using the amazing Urban throwback paper packet. You know I have a tutorial for you too! The pattern for this layout, uses small strips of paper, that could easily be duplicated using scraps from your stash! As always I say shop your stash for embellishments, stamps, etc more often than not, you will have exactly what you need!


In my video you will see that I used this Adventure Ahead sticker that would have otherwise been covered up. Thinking out side of the box for other ways to use your supplies is always a great way to bash your stash! 

And now for the tutorial:
Supplies used: 

Thanks for stopping by!


12/28/2019

Masculine Layout | Close to My Heart Urban Paper

It's not everyday we come across a masculine paper, let alone an entire workshop designed to create layouts and cards. I am back with my Urban paper collection workshop tutorials, on layout number two.
I take the Urban paper packet, [which by the way is on throw back until December 31st] + sticker sheet, plus paper and a black shimmer brush from stash to complete the workshop instructions!

Layout number two: Torn edges


So now that you can see how cute this layout is, lets check out the video tutorial!


Thank you for stopping by! 

Supplies used: 
White Daisy Cardstock
Peacock Cardstock
Saffron Cardstock
Pewter Cardstock
Toffee Cardstock
Black shimmer brush
Black journaling pen

All supplies can be purchased on my website, and you can snag the instructions for free there also to create this page plus more. 


Single Scrapbook page| Diagonal Design

Do you love to create scrapbook pages? How about single pages? If so, are single pages something you do often?

If you answered yes or no to any or all of the questions above, I have a fun tutorial for you! This quick and easy layout is done using the Urban Throwback paper from Close to My Heart, along with the FREE (isn't FREE the best) workshop instructions! Seriously, no strings attached, the instructions are free with no purchase necessary. [I will have the link below.] This workshop guide cuts out three double layouts, one single layout (what we are going to check out today) and 5 cards! From start to finish it takes about 3 hours to cut, assemble and embellish.

Layout one: Single layout 

I created a video for each layout and the five cards, let's take a look at the first layout: 


I used the paper packet plus sticker sheet, and pulled the rest of the workshop supplies from my stash. I encourage you to do the same, always shop your stash first, you will be surprised at how well a layout will turn out and how much of your stash you will use in the process. Click the picture below to get the workshop downloadable PDF (Available until December 31st) for free with no purchase necessary! 


Thank you for stopping by! 

Supplies used: 
Urban Paper Packet + sticker sheet
White Daisy cardstock
Peacock cardstock
Saffron cardstock
Toffee cardstock
Pewter cardstock
Black Shimmer brush


12/04/2019

Wooden Wreath Class

January is National Papercrafting Month!

I have a great class lined up to celebrate it, a gorgeous wooden wreath!!!

This class includes a selection of four gorgeous wooden wreath kits to help you boost your home décor!


Each of these four kit options is unique —Be Kind, Create, Grateful, and Stay Awhile—you can easily tailor this home décor piece to reflect the purpose or vibe of the room in which you choose to place it!


The sturdy plywood wreath stands up to time and each kit option includes realistic paper flowers and leaves, along with an elegant paper bow for embellishment! In addition, each wreath kit comes with colorful backing paper, which you can use to personalize it even more.

Deadline to RSVP is January 25th 2020

Class will be February 9th 2020 at 3:30pm

$40.00 Class Fee includes adhesive


Family Ties - Scrapbooking class

Hey There! 

Welcome to my page! Today I am talking about one of three January Classes I am holding, "Family Ties" kit from close to my heart. 

During class we will create three coordinating 12" ×12" scrapbook layouts. No fussy-cutting required!

Layout one: This page highlights the matriarch or patriarch of your family and extends to a beautiful tree of life where you can fill in names.

Layout Two: Embracing your family as is or as it continues to grow...


Layout Three: Dig deep and pull out those favorite pictures of you and a loved one and tell the story. Perhaps you have a found recent memory of you and a loved one. 


Each participant will receive: 6 base pages, die-cuts, stickers, pre-cut paper pieces, photo placeholders, printed instructions, Tombow Dual-tip Permanent Glue Pen, and four 12" ×12" top-load Memory Protectors™ for three 2-page layouts.

$30.00 per student
Registration Closes 12/27/2019


12/01/2019

Christmas Cards | Simple and Clean


Simple, clean lines are my favorite kind of cards. They are easy to create and make card making in large batches fast. I created 24 cards using 2 basic card designs, altering them to create 6 different styles. Each style has 4 cards, giving me 24 finished cards. 

Let's go through each card style and run down what was done to create that style. Finishing Touches on the cards are Outline the card, accent pieces and sentiment cardstock pieces with a Black Journaling Pen (.05) and loose sliver sequins adhered with clear Tombow mono adhesive.

Card 1: 
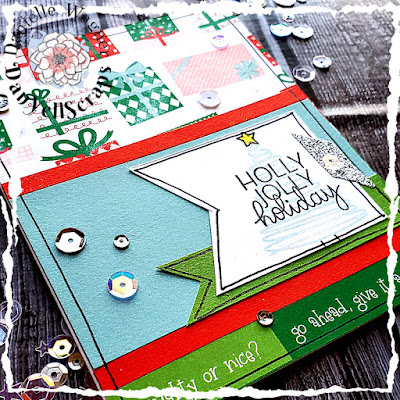
A simple dove tail on the white daisy sentiment piece and clover accent piece give this card a splash of character. We could stamp the sentiment and be done, however adding a whimsical christmas tree in Glacier Ink adds depth to the 2D card. Next a quick outline of the star, colored in with the new Light Yellow TriBlend™ Marker by Spectrum Noir. 

Holly Jolly Holiday - Card One (1)


Holly Jolly Holiday - Card One
Card 2
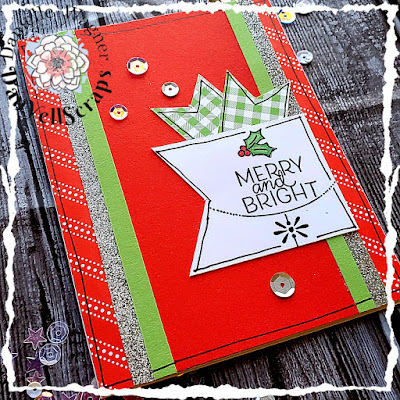
Dove tail the white daisy sentiment and accent cardstock pieces (this is my favorite way to add character and detail to cards) the "Merry and Bright" sentiment is accented with a cute little Holly. Colored with the Dark Red TriBlend™ Marker and Light Green TriBlend™ Marker. 

Merry and Bright - Card two (2)


Merry and Bright - Card Two
Card 3:
The White daisy sentiment piece is dovetailed and stamped with a snowflake in glacier ink, topped with the sentiment "Joy" in intense black ink. I used intense black ink, so that when the clear shimmer pen was added, the ink didn't smear into the glacier snowflake. The Holly was colored with the Dark Red TriBlend™ Marker and Light Green TriBlend™ Marker. 

Joy - Card Three (3)


Joy - Card three
Card 4
Tone on Tone stamping to create customer pattern paper, was my default technique. The card stock is clover, and because I couldn't find my clover ink, I used willow ink. Topped off these whimsical tree with some gold shimmer. The Sentiment "December 25" is stamped in intense black ink, and topped with clear shimmer. I stamped, colored and fussy cut the adorable Holly image. Bringing in that dovetail again with the pattern paper, and white daisy cardstock (It really a simple and quick thing to do) 

December 25th - Card Four (4)


December 25th - Card Four

Card 5: 
This stamp is a mini set, making it a great compliment to any Christmas stamp collection. Not much is needed to spruce this card up. A simple addition of 3D foam tape to the back of the sentiment piece after it was dovetailed. 
Christ the Savior is Born - Card Five (5)


Christ the Savior is Born  - Card Five

Card 6:
Holly Jolly Holiday the Santa image accent each other so well. Using theDark Red TriBlend™ Marker on Santa's hat and the holly I was able to create shadows and blend evenly having all three shades in one marker. To give his hat and beard some "color" the lightest color of the True Blue TriBlend™ Marker was added to the areas that a shadow may show.  To lighten the blue up even more, the Blender Marker was used. 
Santa was popped up with some 3D foam tape. 
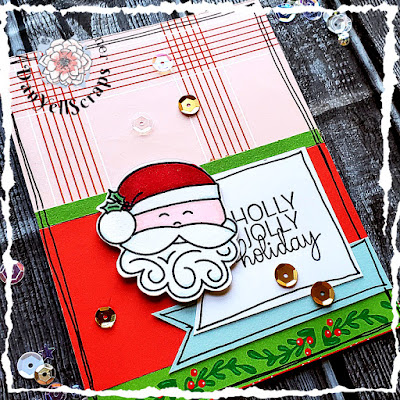
Holly Jolly Holiday with Santa - Card Six (6)


Holly Jolly Holiday with Santa Card Six
Here is another look at all the cards together. I am very proud to send these out to our friends and family this year! 


A full list of supplies used: 
Paper: 
  • Holly Jolly Coordinating Cardstock X7250D $9.95
  • Holly Jolly Paper Packet X7250B $6.95

  • Inks & Coloring:

    Embellishments 
  • Silver Loose Sequins Z4304 $5.95
  • Gold Loose Sequins Z4235 $5.95
  • Silver Shimmer Trim Z1799 $5.50

  • Basics

    Thanks for stopping by and checking out my 2019 Christmas Cards! I hope I have inspired you to be creative this holiday season. 

    DanYell


    11/21/2019

    Best Friends Furever: Album Class

    Show your LOVE for your furry friends, document your favorite memories of your pals with paws with this brand-new, one-of-a-kind class!


    This 6" x 8" layout kit is the first of its kind and features reversible die-cuts, so you can choose dog or cat-focused titles and accents for this quick and easy project! Also comes with stickers, photo placeholders, 6" × 8" Memory Protectors™, and printed instructions.


    Your kit  includes all the materials needed to create 6x8 pages, it also comes with stickers, photo placeholders, 6" × 8" Memory Protectors™, and printed instructions.

    * No Fussy cutting!!!

    Need an album to keep your completed pages in? Select that option when checking out, or use one you have in your stash!

    Here are my sample pages using the dog portion of the kit:


    In person class will be Sunday January 19th 2020 4pm Pottery Perfection "Done Your Way"
    Registration for this class closes 12/27/2019

    Album Options


    Thanks for stopping by - See ya in Class!
    DanYell

    11/18/2019

    Gratitude with Attitude|H2H challenge

    Welcome to our H2H challenge! If you are new to the H2H (Heart 2 Heart)challenges, you're in for a treat. Each week you are challenged to use at least one of your Close to my heart item(s) to create a project based on the given theme. You have all month long to link up your project!

    This weeks theme is Gratitude with attitude! This theme is subject to your interpretation of this theme. If you have the November Stamp of the Month from Close to my Heart, you'd have a great starting point.


    My project does not involve that stamp set, instead I choose a layout from the reasons to smile calendar kit. 


    This layout - spills my attitude for gratitude. My daughter gives me so many reasons to smile, and for that I am ever so grateful. 

    Everything I needed to complete this layout was included in my kit. Making this a quick, simple and beautiful layout in 15 minutes. 

    Inspired to get your craft on and link up your artwork, or do you need more inspiration? Click here to learn more about this weeks H2H challenge. 

    Leave a comment below on your favorite reason to smile! 


    11/11/2019

    World Kindness Day|H2H Challenge

    Welcome to our H2H challenge! If you are new to the H2H (Heart 2 Heart)challenges, you're in for a treat. Each week you are challenged to use at least one of your Close to my heart item(s) to create a project based on the given theme. You have all month long to link up your project!

    This weeks them, as the title may have clued you in, World Kindness Day. For my inspiration project, I am headed to my Reasons to Smile Calendar Kit - this kit available through December 31st, has 13 layouts and I am showing off one here. Kindness starts at home, and this layout captures that perfectly.


    The love and kindness captured between my daughter and my grandmother is what each child in our family gets from her. Our kindness is driven from her, and our desire to share that kindness is inspired through her. 

    Spread some kindness today! 

     Everything I needed to complete this layout was included in my kit. Making this a quick, simple and beautiful layout in 15 minutes. 

    Inspired to get your craft on and link up your artwork, or do you need more inspiration? Click here to learn more about this weeks H2H challenge. 

    Leave a comment below on your favorite way to spread kindness! 

    Thanks for stopping by!

    DanYell Scraps


    11/08/2019

    Memory keeping in the kitchen?

    How many family recipes do you have in your recipe books? How many of those have been passed down for generations? Of those passed down, how many tell a story?

    My latest class talked about, and created a recipe album focused around that simple concept to create a family traditions recipe album.


    We have recipes on my mother's side of the family, that start with a simple pound cake, made regularly, so that when a guest popped by my great-grandmother always had a treat to share.  I always knew that this was a family recipe, but I had no idea that my family shared this as special guest treat! 


    Stories like these, especially around food, are timeless and a great way to bond our past to our present everytime we cook. 


    Each class participant walked away with a jump start on a book ready to fill with more family recipes, stories and pictures. Some were gifting these, others choose to keep them, use them, and pass them down. 

    If you'd like to order supplies to create your own family Traditions album, follow the supplies listed below, and I will email you instructions to get you well on your way to an amazing recipe book of your own. 
    Hurry supplies are low for the holiday kit.


    Looking for more classes of mine? Check out my December "Reasons to Smiles Calendar in Person Class" post. 

    Thanks for stopping by
    DanYell Scraps

    10/28/2019

    Anything Goes|H2H challenge

    Hey There! Welcome to a new weekly challenge from Heart 2 Heart!


    I love an anything goes challenge. I am currently elbow deep in the Every Little Thing collection. I have a host of pictures from this summer that go perfectly with this collection...so why not show off what I am working on! 


    I have used the pattern paper collection from Every Little Thing and pattern #14 from Make it From Your Heart Volume 2 to create this clean layout. 

    Now it is your time to give it a try and link it to the HEART 2 HEART Challenge. You have until October 31st to participate in this challenge. We love to see your inspirations!!