Hello & Welcome back to DanYell Scraps!
I am so excited to share with you a set of cards and a layout using the Chelsea Gardens Scrapbooking stamp set by Close to My Heart.
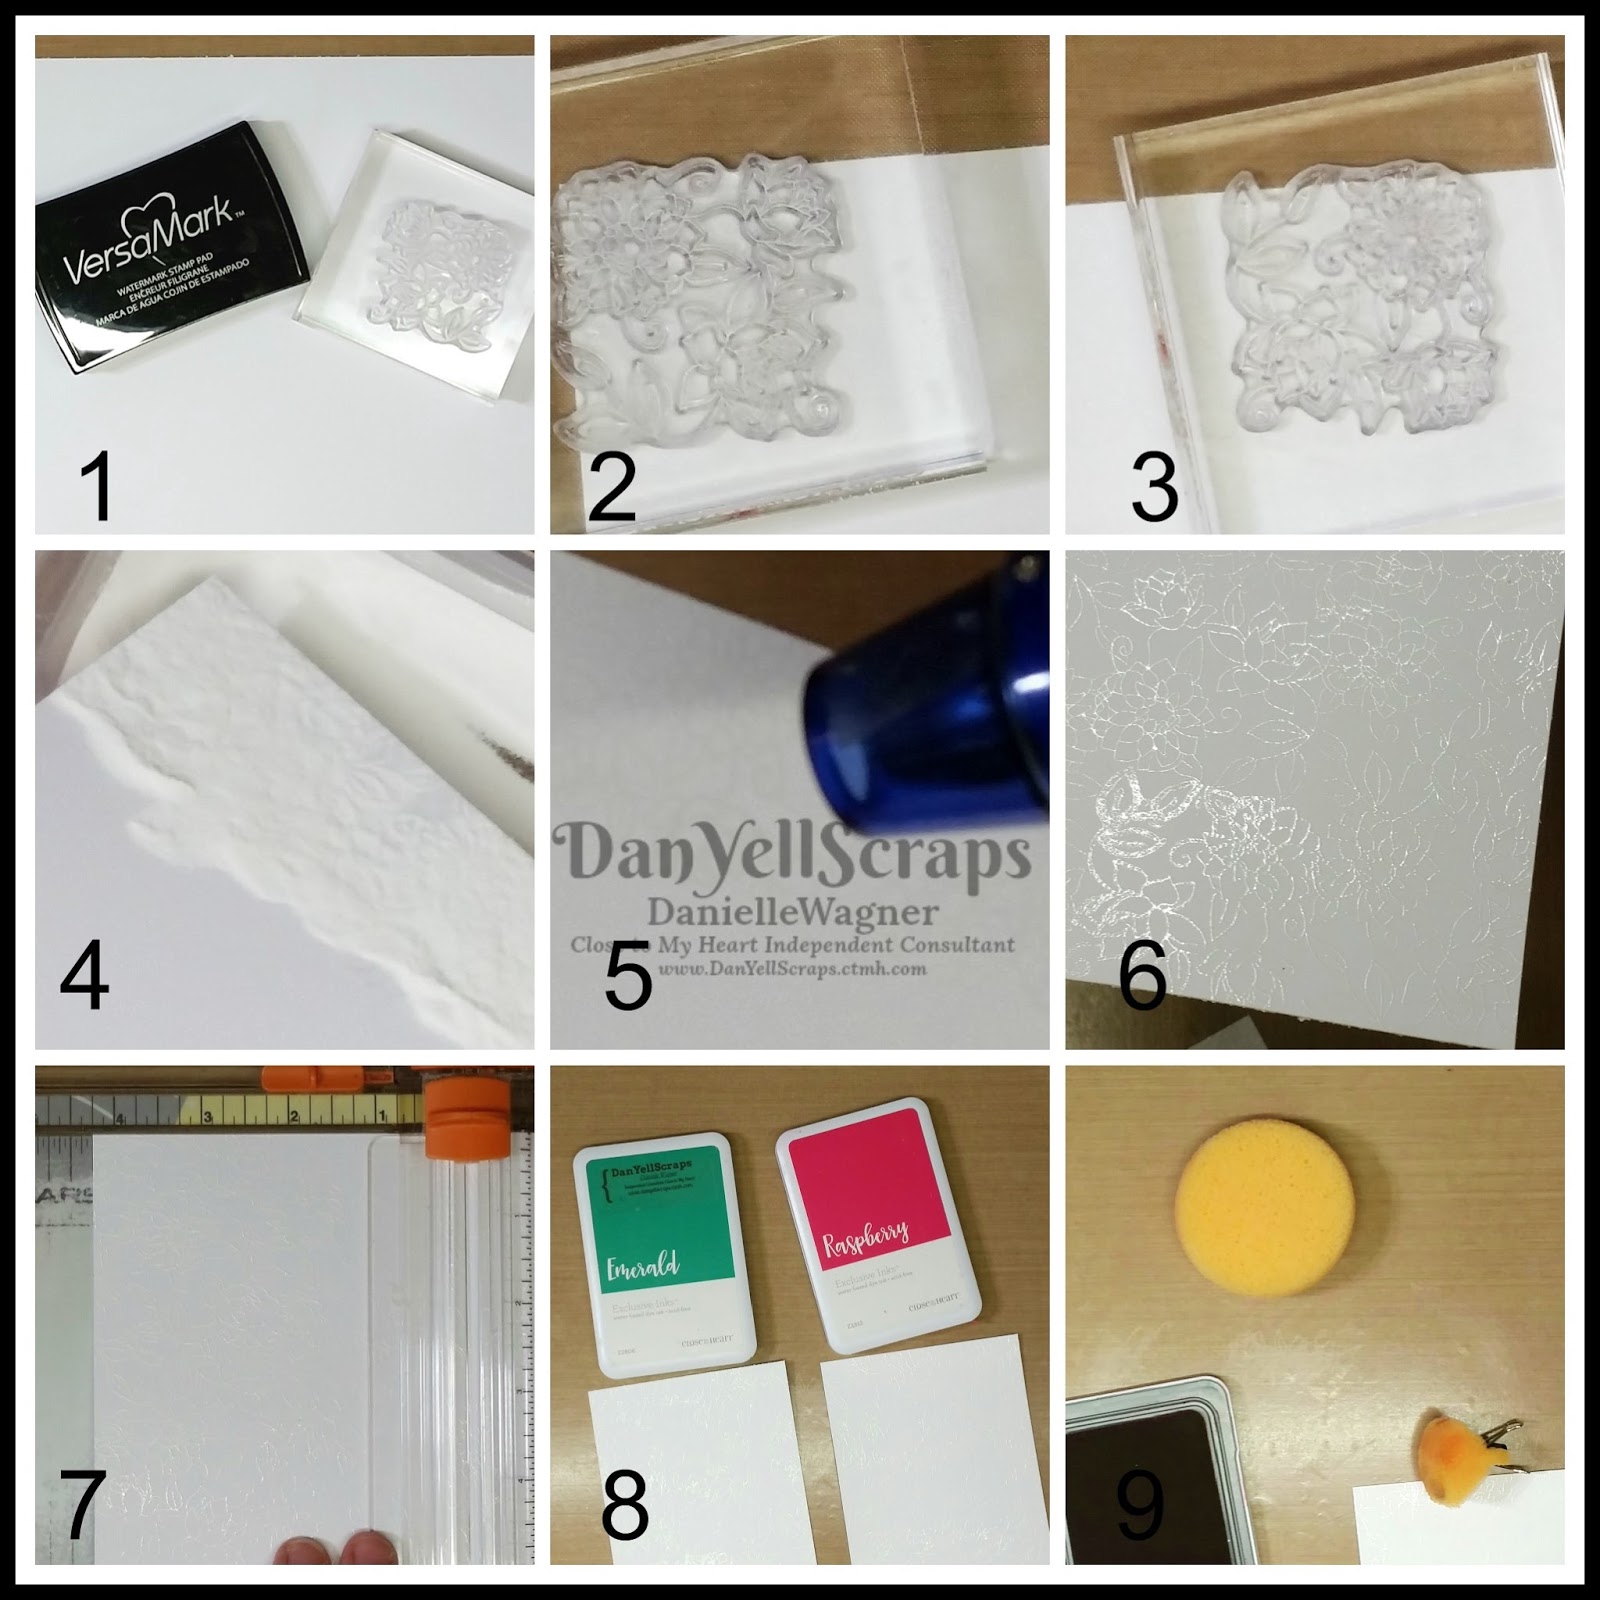
I started with a focus stamping technique on a series of cards, seen below.
These cards were so easy to create, and I know you'll be excited to do it too!
The object of focus stamping is where one image stands out, or is the focal point. On each card I have stamped an image in a very bold color, then repeat stamped the same image in a lighter color. Of course if you do not have two shades of red, blue or your favorite color hue, you can simply apply the second generation stamping here.
If you are not familiar with second generation stamping, it is where you ink your stamp, then stamp on a scrap paper piece, then without re-inking, stamp on your project. The result is a lighter shade of the original color.
I choose to use light and dark inks. I really like the combos used and the amazing results from them.
Pacifica Blue and Lagoon and Juniper and Glacier
Lemon and Canary
Pomegranate and Ruby
The cards were finished off by adding dots of the lightest ink in the white areas. I accomplished this by using the round end of a paint brush. The center of all the flowers were stamped in the color of the year bashful.
In the center of each focus flower, a white pearl gem was added, along with Gold Shimmer from the shimmer brush collection.
The focus leaves are stamped in Fern green, and the secondary leave sets are stamped in sweat leaf.
The front of each card was stamped with the Mini Stamp Thank you. Each panel was cut to 4 x 5.25 and adhered to a 4.25 x 5.5 black cardstock panel.
I am so glad you joined me for a look at focus stamping. I have the links and names of all the items used today at the end.
Now on to the 12 x 12 Layout created with exact same stamp set...Chelsea Gardens D1760
This entire layout was created using cardstock, inks, and a scoreboard. Let's start with the left side of the page.
Beginning with how the upper right hand corner panel was created. Place your cardstock on your scordboard and score every quarter inch.( If you do not have a scoreboard, pal or scoring tool, use the gutter of your cutting board, and your bone folder.) Gently rub heather ink over the raised scored lines, you will achieve that two dimension difference.
The bottom panel was stamped in sweet leaf ink on sweat leaf card stock. The result is that beautiful tone on tone look. A versatile title was added by stamping in versamark ink (clear ink) with Ranger white embossing powder added and heated. Then three strings of the white gold twin was adhered with two staples on each end and frayed.
Moving over to the right side of the layout, we can see that charcoal grey scored panel again, the tone on tone sweet leaf cardstock ink combo, and the decorative element of twine frayed and stapled. You will also see an interactive element in disguise.
First I'd like to take a peek at the beautiful flowers on this page. Those are not B&T pages! Those are hand stamped images on white daisy cardstock.
I just love how beautiful it turned out. The flowers are stamped in Juniper and Glacier inks. The centers are stamped in Heather and Charcoal grey inks. The leaves are stamped in fern and sweet leaf. Creating your own B&T paper is really easy, just make sure to stamp off the page as you see below, to give a free flow, and you are pretty much golden.
Now for the magical interactive element.
Viola - an area for extra photos, journaling, or memorabilia.
Here is a recap of the supplies used in these projects.
Stamps: - Close to My Heart always features a stamp of the month
- Chelsea Gardens stamp set D1760
- Thank You M1178
- Thinking of You
Cardstock colors (remember close to my heart now offers their cardstock with a lighter version on the other side.
- Charcoal
- Sweet Leaf
- White daisy
- Mink
- Black
Inks: Close to My Heart Ink pads are no long the swivel case, but a fully opening magnetic case.
- Juniper
- Pacifica Blue
- Glaicer
- Lagoon
- Pomegranate
- Ruby
- Canary
- Lemon
- Heather
- Mink
- Charcoal
Thank you for stopping by! Leave a comment below if you have tried this before, love it, or want to try it! Happy crafting!
Danielle Wagner
Close to My Heart Independent Consultant!
www.danyellscraps.ctmh.com
DanYell Scraps on Facebook & Instagram